How to Customize the Create Contact Form in HubSpot
Sales reps are creating contacts with nothing but a name and email.
No company. No lead source. No phone number. No context.
Six months later, you are staring at 2,000 contacts you cannot segment, cannot route, and cannot report on.
This is one of the most common data quality problems in HubSpot, and most companies do not realize they have it until the damage is done.
The Problem With Default Contact Creation
Out of the box, HubSpot lets anyone create a contact with minimal information. Click "Create contact," type a name and email, hit save. Done.
This feels efficient in the moment. The rep moves on to their next task. But that contact now exists in your CRM without any of the data you need to actually work it.
No lead source means you cannot attribute it to a campaign. No company association means it sits orphaned, disconnected from account-based workflows. No phone number means the next rep who picks it up has to hunt for contact information.
Multiply this by every manually created contact across your entire sales team, and you have a database full of records that look complete but are actually useless for segmentation, routing, and reporting.
The solution is simple: control what fields your team sees and what they are required to fill in before they can save a new contact.
The Fix Takes 5 Minutes
Settings → Objects → Contacts → Customize the "Create Contact" form
This controls exactly what your team sees when they click "Create contact" and what they are required to fill in before they can hit save.
What You Can Do With This
The Create Contact form customization gives you several capabilities:
Add any property to the form. Surface the fields that matter for your process. If you need industry, add it. If you need a custom property like "Referred By," add it.
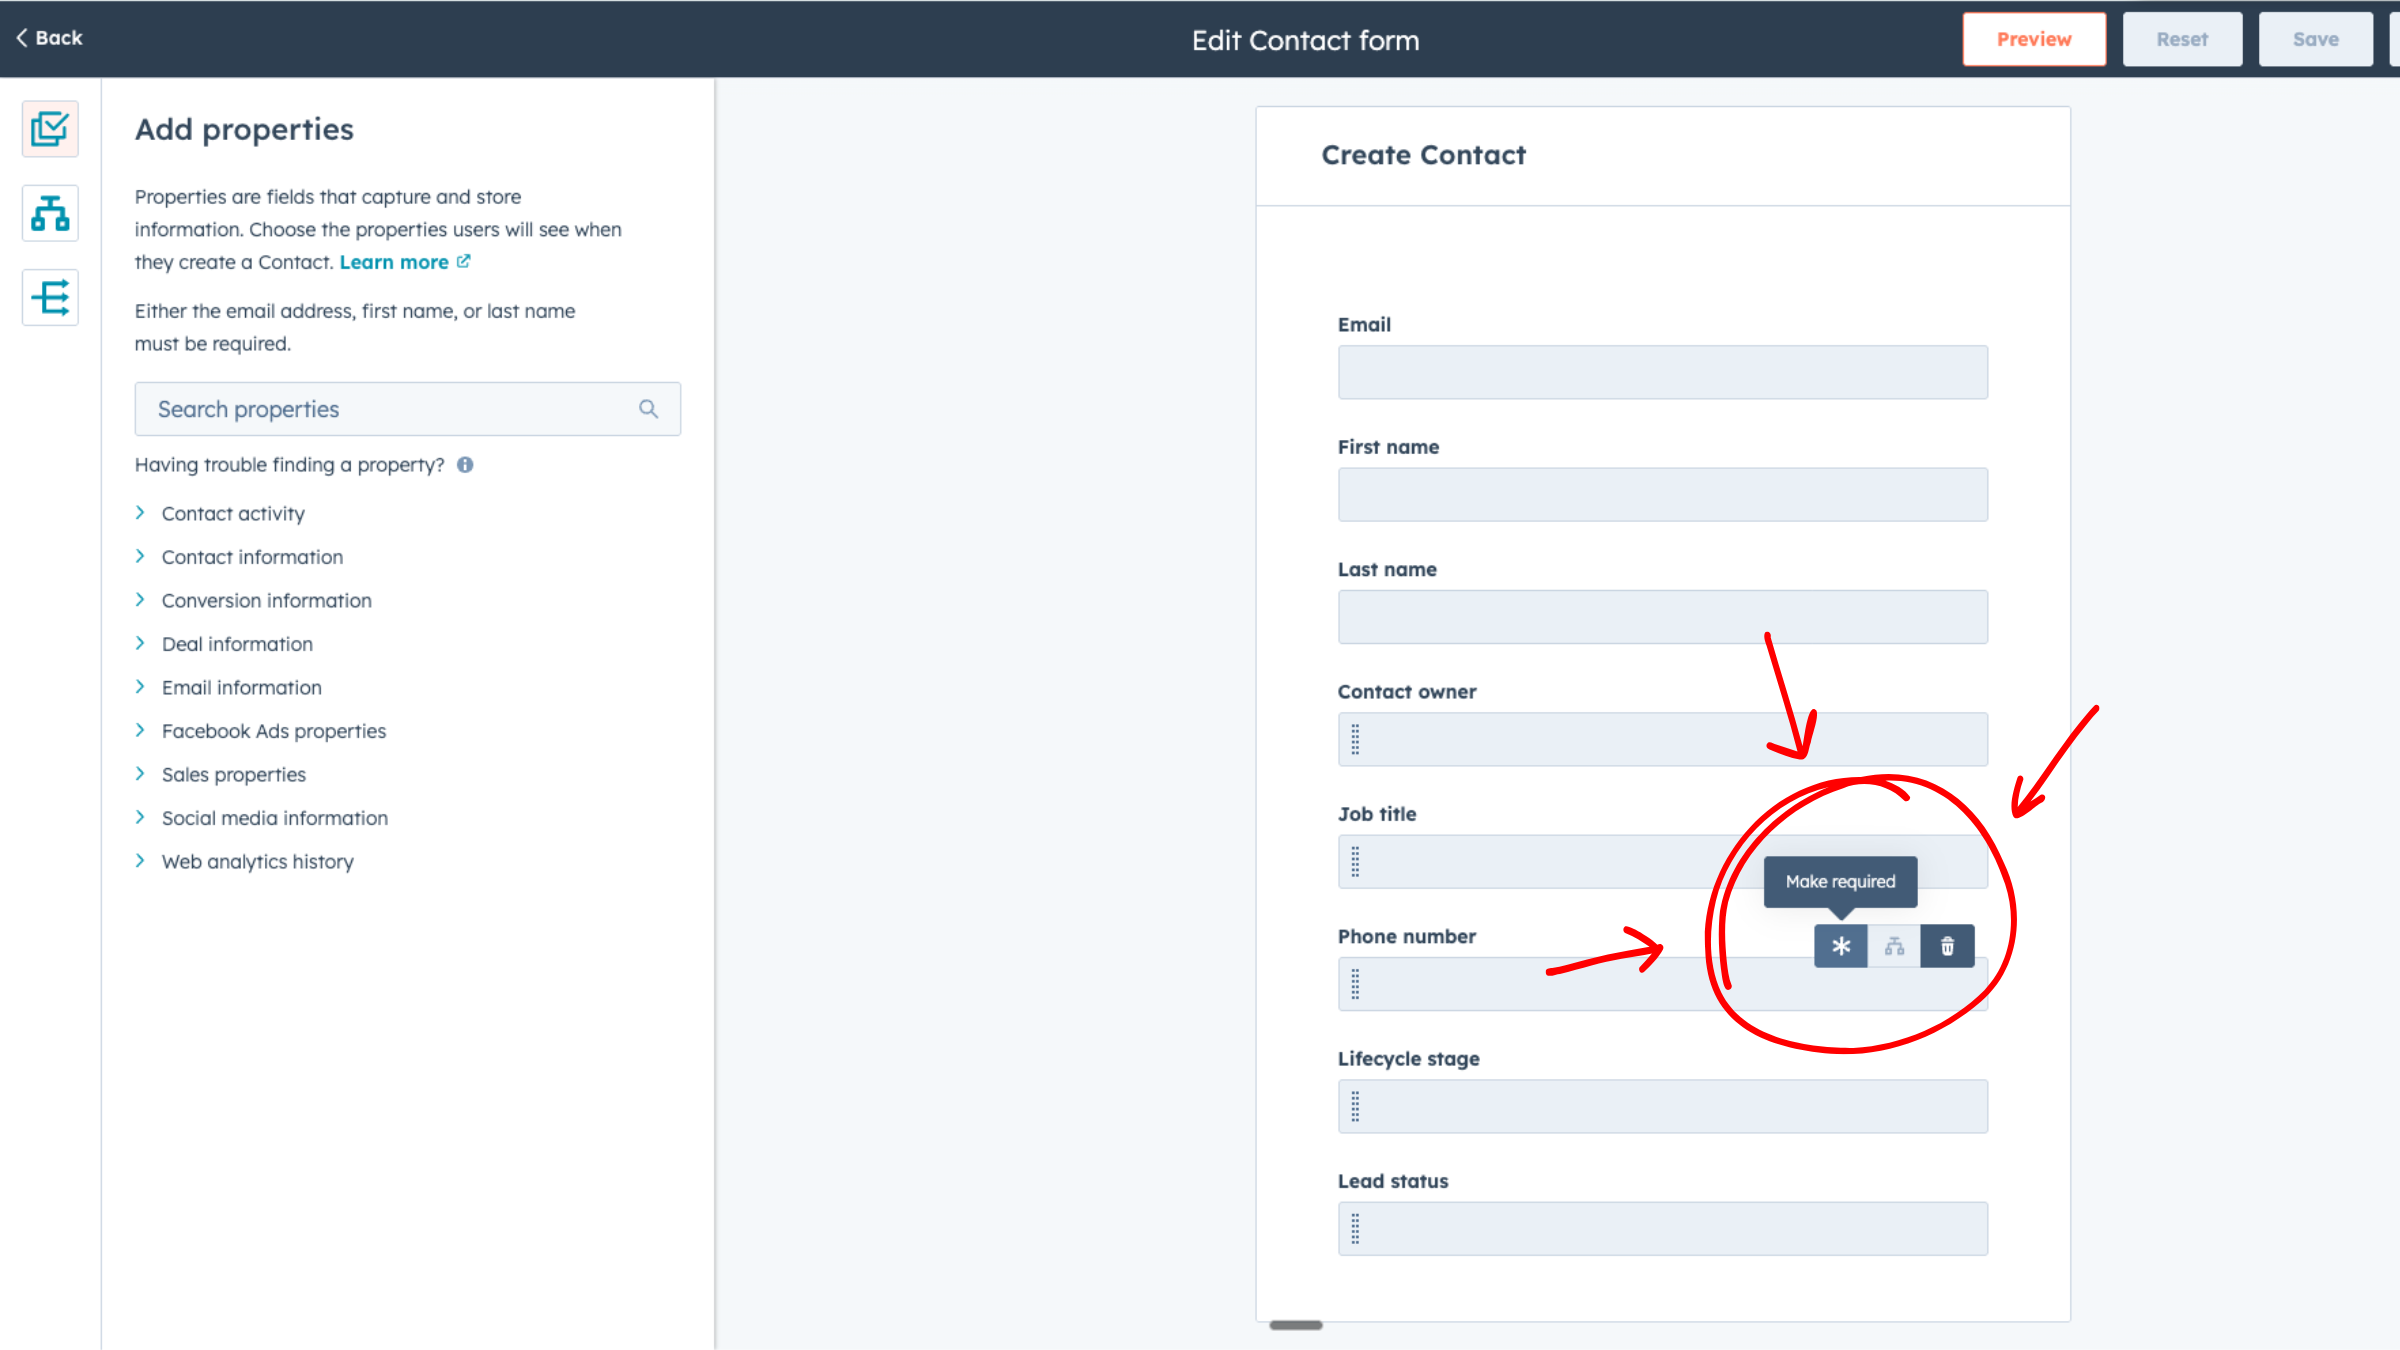
Make any property required. A required field must be filled in before the contact can be saved. No exceptions, no workarounds.
Add associations. Include Companies, Deals, or other objects on the form. Reps can link the contact to related records during creation instead of doing it later (or forgetting).
Make associations required. Force reps to link a contact to a company before they can save. No more orphan contacts.
Add conditional logic. Show additional fields based on dropdown selections. If they select "Event" as the lead source, show "Event Name" and "Event Date." If they select "Referral," show "Referred By."
Conditional logic keeps the form clean for simple cases while capturing detailed information when it matters.
5 Real-World Configuration Examples
These are starting points. Adapt them to match your actual sales process and the data you need to capture.
1. Make Lead Source Required
Add the Lead Source property to the form and mark it as required.
Now every contact has attribution from day one. No more guessing where leads came from when you are trying to measure campaign ROI. No more running reports that show 40% of contacts with blank lead sources.
This single change has an outsized impact on reporting accuracy.
2. Make Company Association Required
Add the Company association to the form and mark it as required.
Reps must link the contact to a company before saving. If the company does not exist, they create it first.
No more orphan contacts floating in your CRM that never get worked. Every contact belongs to an account. Your account-based workflows and routing rules actually function.
3. Make Phone Number Required for Sales-Created Contacts
Add Phone Number to the form and mark it as required.
If a rep is manually adding someone, they probably talked to them. Capture the phone number while it is fresh.
This is especially valuable for contacts from phone conversations, trade shows, or in-person meetings. The phone number exists. Make sure it gets into the CRM.
4. Add Conditional Logic on Lead Source
Set up conditional logic so additional fields appear based on the Lead Source selection.
If they select "Event," show:
- Event Name
- Event Date
If they select "Referral," show:
- Referred By
If they select "Partner," show:
- Partner Company Name
Conditional logic keeps the form simple for common scenarios while capturing the specific details you need for each lead source type.
5. Add Conditional Logic on Lifecycle Stage
Set up conditional logic based on Lifecycle Stage selection.
If they select "Customer," require:
- Product/Service Purchased
- Contract Start Date
If they select "Opportunity," show:
- Expected Close Date
- Deal Amount
This prevents reps from marking contacts as customers or opportunities without providing the context that makes that status meaningful.
The Result
When you customize the Create Contact form properly, every manually created contact has complete data from the start.
Your reps stop asking "where did this lead come from?" because the answer is already in the record.
Your reports actually mean something because the underlying data is consistent and complete.
Your lists actually segment properly because every contact has the properties you are filtering on.
Your routing rules work because contacts have the data points those rules depend on.
This is a five-minute configuration change with compounding returns. Every contact created after you make this change enters your system with the data you need. Over months and years, that adds up to a dramatically cleaner database.
Frequently Asked Questions
Does this affect contacts created through forms or integrations?
No. This customization only affects the "Create Contact" button in the CRM UI. Contacts created through form submissions, integrations, API calls, or imports follow their own data rules.
Can I create different forms for different teams?
Not directly with this feature. The Create Contact form is global. However, you can use conditional logic to show different fields based on a selection that varies by team role, such as a "Contact Created By" dropdown.
What happens if a required field is removed from the form later?
Contacts created before the removal keep their data. New contacts created after the removal will not have that field on the form, so it will not be filled in. Plan your changes carefully.
Can I make the form different for contacts vs. companies vs. deals?
Yes. Each object type has its own "Create [Object]" form that you can customize independently. The same principles apply: add fields, make them required, add conditional logic.
Will this slow down my sales team?
Adding one or two required fields adds seconds to contact creation. The time saved on data cleanup, follow-up research, and reporting corrections far exceeds those seconds. Frame this as investing a few seconds now to save hours later. Learn more at the HubSpot Knowledge Base: Set Up Fields for Creating Records.
Next Step
The Create Contact form is one configuration screen in a portal with hundreds. When each screen is configured properly, your HubSpot becomes a system that enforces data quality by design.
When configuration is neglected, you end up with a CRM full of incomplete records and manual workarounds.
We will audit your HubSpot configuration and show you exactly which settings are creating data quality problems and operational friction.
Ready to fix your HubSpot setup?
Get a free sales operations audit to see what's broken and what it would take to fix it.